
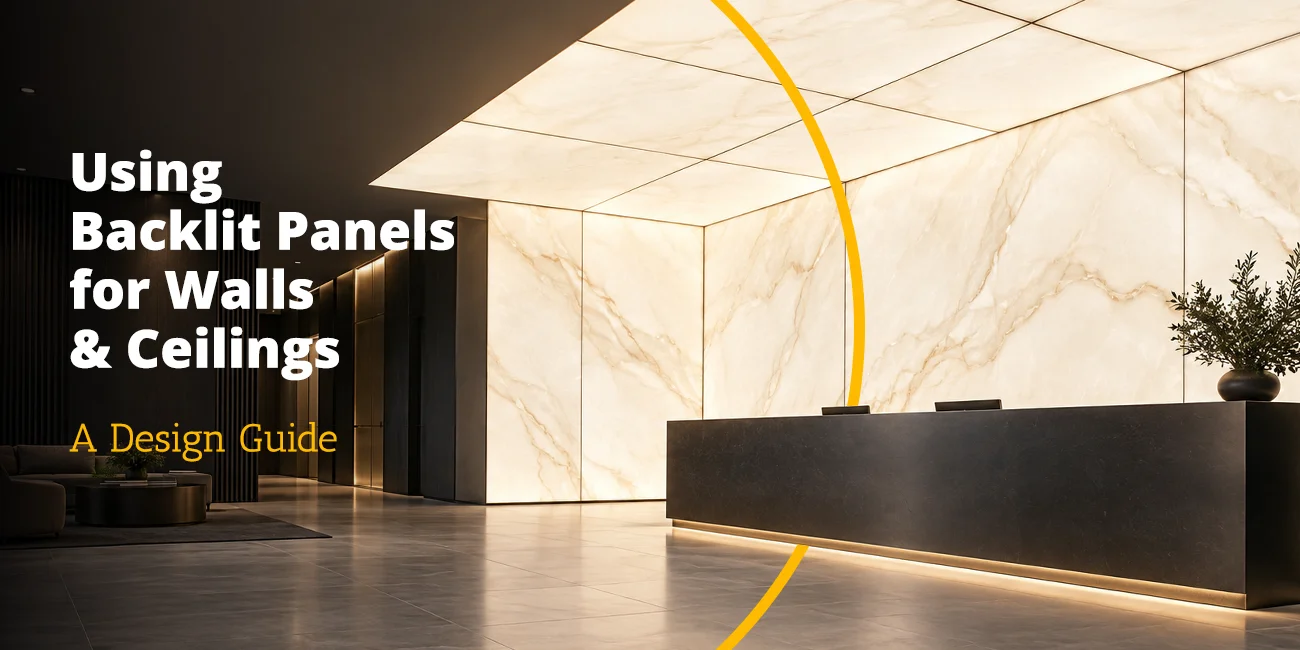
A glowing wall looks effortless when it’s done right — one continuous plane of light with no hot spots, no visible hardware, no shadow lines. Getting there, however, is a design and engineering exercise: panel selection, joint strategy, mounting depth, power routing, and material choice all have to be resolved before anything goes on site.
What Backlit Wall Panels Actually Are (and How They Work)
A backlit wall panel is a layered assembly: an LED light source, a light-distribution layer, a diffusion layer, and — optionally — a decorative face such as printed film, translucent stone, resin, or fabric. The heart of the modern version is the edge-lit light guide panel (LGP): LEDs mounted along the panel edge inject light into precision-patterned acrylic, which redirects it evenly across the face.
Edge-lit construction is what makes shallow backlit walls practical. Because the LEDs feed light through the panel edge rather than sitting in an array behind the face, the light-guide component can be only a fraction of an inch thick. The complete assembly will be deeper once profiles, diffusion, face material, wiring clearances, and mounting are included. If you’re weighing approaches, this comparison of backlighting technologies explains when edge-lit, direct-lit, and flexible LED sheets make sense.
Step 1: Define the Surface — Wall, Ceiling, or Both
Walls. Feature walls, corridor panels, reception backdrops, stair walls, and niches are the most common applications. Vertical surfaces are viewed at close range, so uniformity is unforgiving — any brightness “”cloud”” or edge striping will be seen. Panel quality matters more here than anywhere else; the engineering that prevents those defects is explained in how diffusion films affect LED panel performance.
Ceilings. Luminous ceilings simulate skylights and daylight in interior rooms — popular in conference rooms, spas, healthcare, and elevator cabs. Ceiling panels add two considerations: weight (panels overhead must be positively retained, not friction-fit) and serviceability (plan for panel removal without demolishing the assembly).
Combined wall-to-ceiling wraps are the showpiece move — a plane of light that turns the corner. These demand tight joint planning, which is Step 3.
Step 2: Choose the Light Character
Three decisions define how the surface will read:
Color temperature. Fixed 6500K produces a crisp, cool-white appearance. For projects that need warmer scenes or more flexibility, specify tunable white CCT panels (3000K–6500K) so the same surface can shift from warm evening ambiance to cooler task-oriented light.
Color capability. For brand moments, event scenes, or programmable environments, RGB and RGBW panels add full color control. RGBW is the better wall choice — its dedicated white channel delivers clean white light for everyday use, with saturated color on demand.
Brightness. Target output depends on ambient light and whether the panel is bare-diffused or shining through a face material. Stone veneer and dense resin faces can absorb significant light — brightness must be specified with the face material in hand, which is exactly the kind of detail worth confirming with the manufacturer’s engineering team before ordering.
Step 3: Plan Panels, Joints, and Seams
Large walls are built from multiple panels, and the seam strategy makes or breaks the “”seamless”” effect:
- Maximize panel size, minimize joints. Custom-cut panels sized to your wall reduce seam count versus tiling standard sizes. Custom dimensions are the norm, not the exception, in quality backlit wall work.
- Align joints with the design. Where seams are unavoidable, land them on graphic breaks, reveal lines, or material transitions so they read as intentional.
- Butt-joint behind a continuous face. When a single sheet of diffusion or a printed face spans multiple panels, tight panel alignment and consistent edge brightness keep the joint invisible.
- Cut-outs are fine — plan them. Outlets, switches, and fixture penetrations can be laser-cut into panels with the dot pattern compensated around the opening, preserving uniform brightness. That precision work is part of laser engraving and cutting during fabrication.
Step 4: Resolve Mounting and Depth
Backlit wall assemblies typically live in one of three constructions:
Recessed in the wall cavity. The cleanest look — the luminous surface finishes flush with adjacent drywall or millwork. Requires coordination during framing to provide the pocket, blocking, and wiring path.
Surface-mounted in a trim frame. A retrofit-friendly option: an aluminum perimeter frame carries the panel assembly proud of the finished wall. Confirm the actual build-out with the selected panel, diffuser, face, frame, wiring, and attachment details.
Integrated into millwork. Reception desks, shelving backs, wardrobe interiors, and bar fronts — the panel is designed into the casework, with the shop fabricating around exact panel dimensions and driver locations.
For curved walls, columns, or radiused ceiling coves where rigid acrylic cannot follow the surface, consider flexible LED light sheets and verify bend limits, cut zones, output, attachment, and heat management for the application.
Step 5: Power, Dimming, and Serviceability
LightPanel backlit-wall systems use low-voltage 24V DC at the panel. Driver sizing, voltage drop, wire routing, controls, enclosure requirements, and connection methods must still be coordinated for the project. The practical implications are covered in how light guide panels are powered.
Three rules save headaches later:
- Locate drivers where they can be reached — an adjacent closet, access panel, or millwork cavity. Never bury a driver behind a sealed finished surface.
- Specify dimming up front. The controller and driver must match the panel type and the building’s control system. LightPanel lists options including PWM, 0–10V, and DMX for applicable configurations; confirm compatibility before close-in.
- Design one removable path. At least one panel or trim section should come out cleanly for service access over the system’s life.
Step 6: Select the Face Material
The panel is the engine; the face is the design. Common pairings in current work:
- Bare white diffusion — the pure “”plane of light”” look for skylight ceilings and minimalist walls
- Printed graphic film — brand imagery, murals, and environmental graphics illuminated from behind
- Translucent stone and resin — onyx, alabaster-look composites, and resin panels that reveal dramatic veining only when lit
- Edge-lit glass — for partitions, balustrades, and surfaces needing optical clarity and durability, built on glass light guide panels
One environment note: some projects impose flame-spread, smoke-development, or other material requirements. Review the available flame-retardant panel options, then confirm the exact substrate, test documentation, complete assembly, and acceptance criteria with the project team and authority having jurisdiction.
Where Backlit Walls and Ceilings Deliver the Most Value
Useful applications include hotel reception and corridor walls, spa ceilings, conference room skylight effects, retail fitting rooms and perimeter walls (an approach related to biophilic lighting design in retail), restaurant and bar features, and selected residential millwork. For the broader direction of tunable surfaces, illuminated materials, and specification-led design, see our companion article on 2026 architectural light-panel trends.
Frequently Asked Questions
How thick is a backlit wall panel assembly?
The light-guide material itself may be only a fraction of an inch thick, but total installed depth depends on the LED profile, diffuser, face material, frame, wiring clearances, attachment method, and whether the system is recessed or surface-mounted. Obtain a project-specific section detail before construction.
Can backlit panels be installed on a ceiling?
Yes. Luminous ceilings are a primary application. Ceiling installs require positive mechanical retention of panels, weight coordination with the ceiling structure, and a planned removal path for service.
What material goes over backlit wall panels?
Options include bare white diffusion, printed translucent film, translucent stone or resin veneer, fabric, and glass. Brightness should be specified with the face material in mind, since dense materials absorb light.
Do backlit wall panels get hot?
LED systems still generate heat. LightPanel uses perimeter-mounted LEDs and aluminum profiles for heat management, but the complete enclosure, ambient conditions, operating schedule, driver location, and ventilation must be reviewed for the application.
Start With Real Specs, Not Guesswork
Every successful backlit wall starts the same way: exact dimensions, light character, face material, and mounting condition, confirmed against what manufacturing can actually build. LightPanel produces custom-sized backlit wall panels and ceiling panels in North Carolina, with in-house engineering support from prototype through installation. Request a quote with your wall or ceiling dimensions, or download the catalog for panel types, options, and specifications.

Leave A Comment
You must be logged in to post a comment.